RealEstateContent.ai creates unique-to-you social media content that uploads directly to your social media accounts. If you want to learn how to create, edit and schedule posts follow this quick guide or watch this tutorial video.
Accessing the Content Calendar
You can access the content calendar from your RealEstateContent.ai dashboard at app.realestatecontent.ai/calendar
To locate the Content Calendar:
Expand the sidebar on the left-hand side.

Select “Content Calendar” located underneath “Profile Questions”.
Creating Your First Post
To create pictures and captions for your content calendar follow these steps.
Use the search bar next to the “Generate” button to type in a topic, or click “Suggest Topic” for AI-generated ideas.
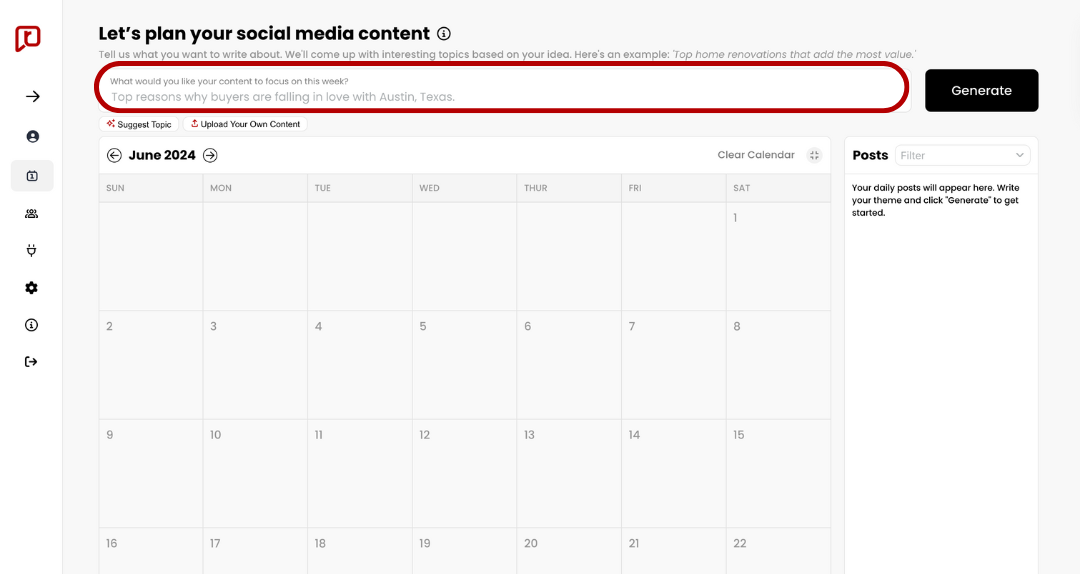
Example: Typing “Starting my journey: A beginner’s guide to buying your first home in Dallas” will prompt the AI to create an informational post for first-time homebuyers in Dallas.
Next click the black “Generate” button at the top right of the screen.
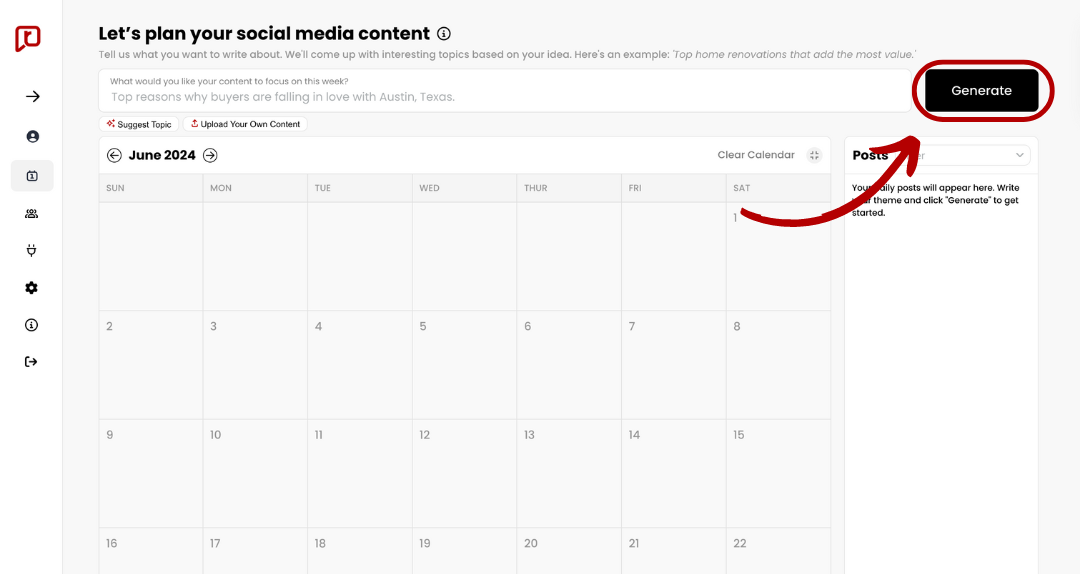
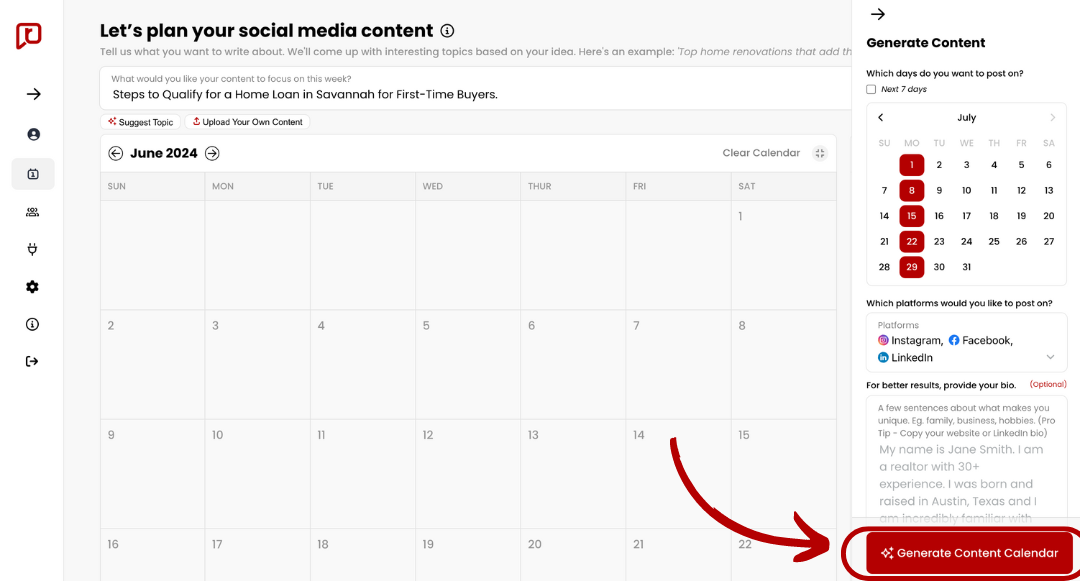
A sidebar will appear with a mini content calendar, platform dropdown, and a section to edit your bio.
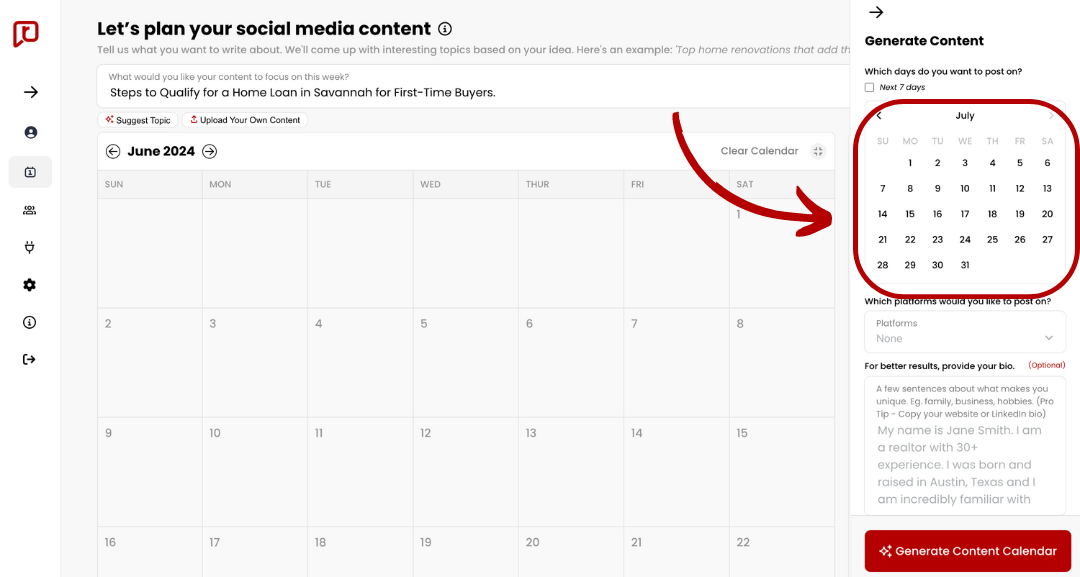
Select the days you want to post.
Next choose your platform to post on (Instagram, Facebook, X, LinkedIn, and blogs)
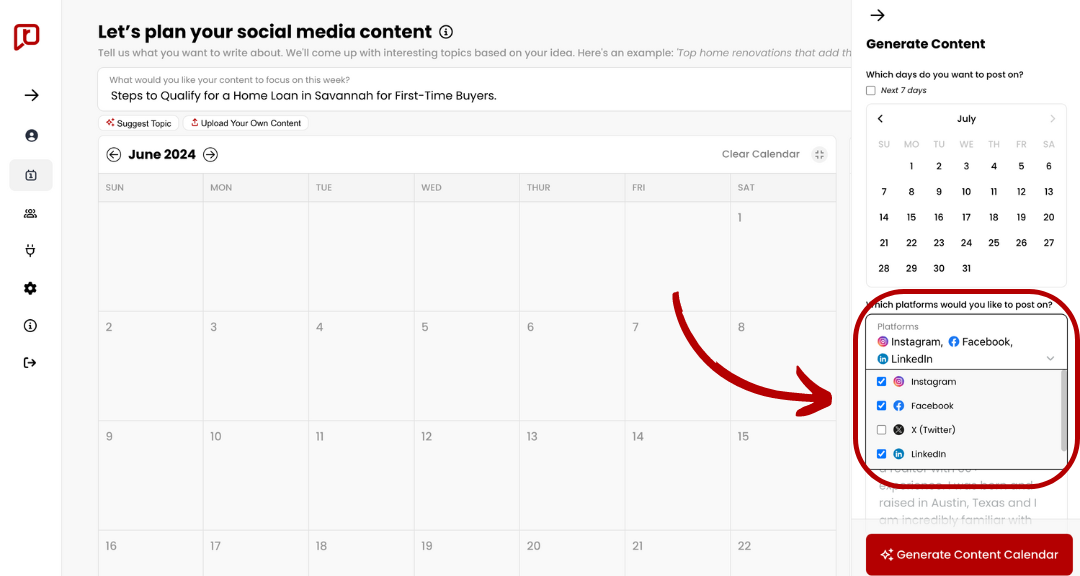
Finally click “Generate Content Calendar”.
If done successfully you will see a notification appear that your posts are being created. Depending on how many posts you make and how many days you select will determine your load time. If your posts have not loaded after 2 minutes, please refresh the page to correct.
Editing Posts
RealEstateContent.ai allows you to edit and customize your picture and captions. Follow these steps to create custom one of a kind content that includes your branding, headshot and contact information.
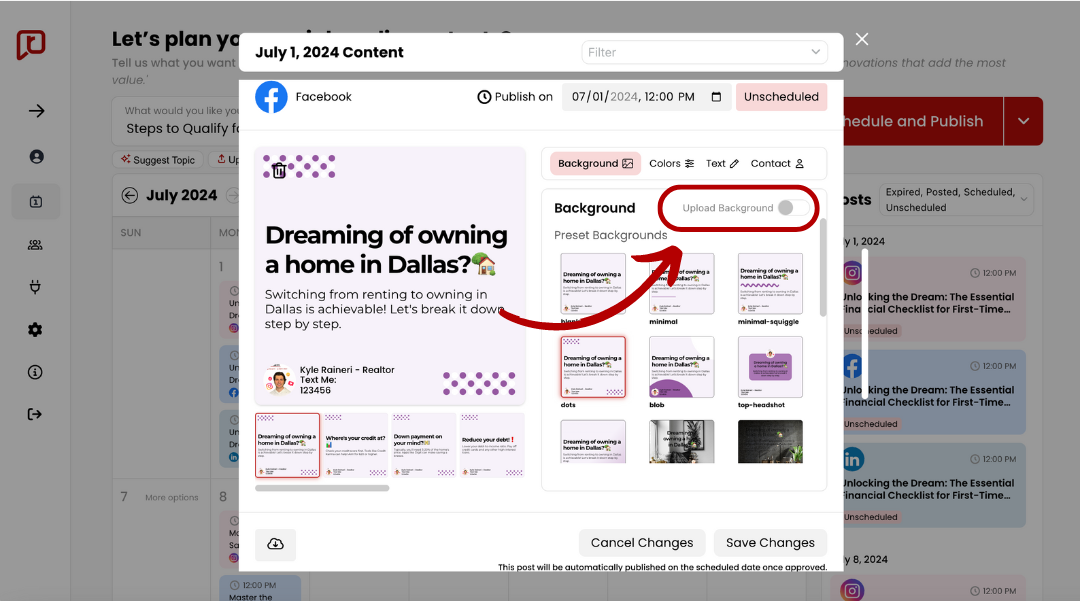
Changing Backgrounds:
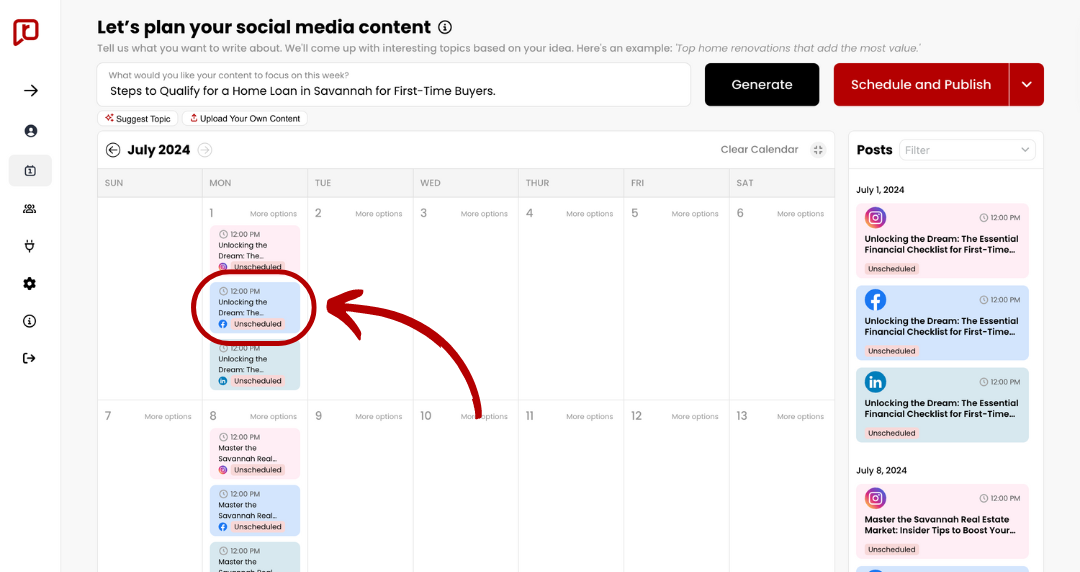
Click on a post for the day you want to edit.
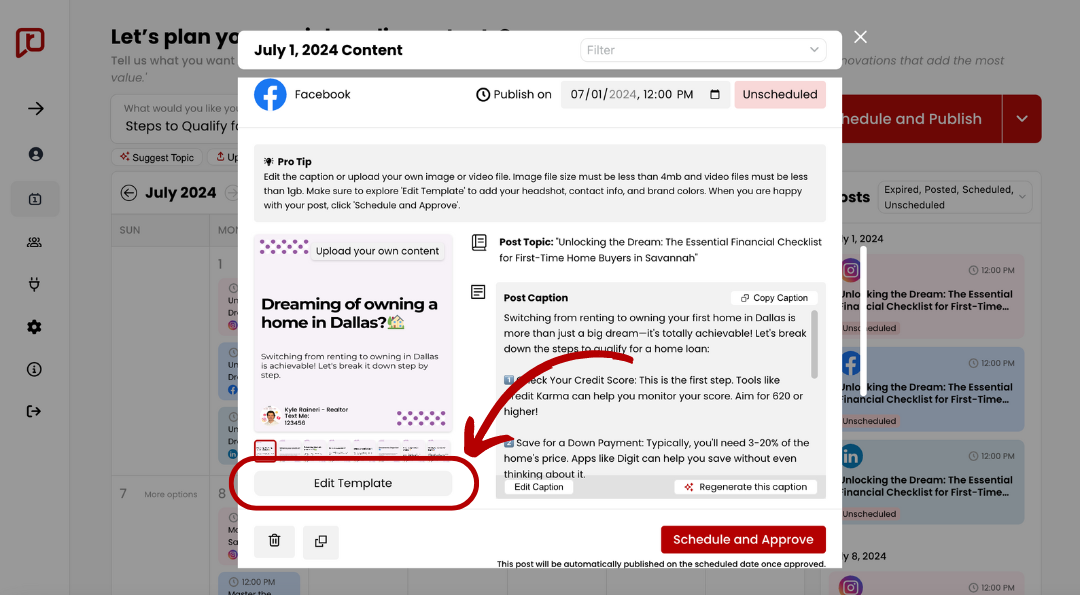
Find and select “Edit Template” at the bottom of the preview window.
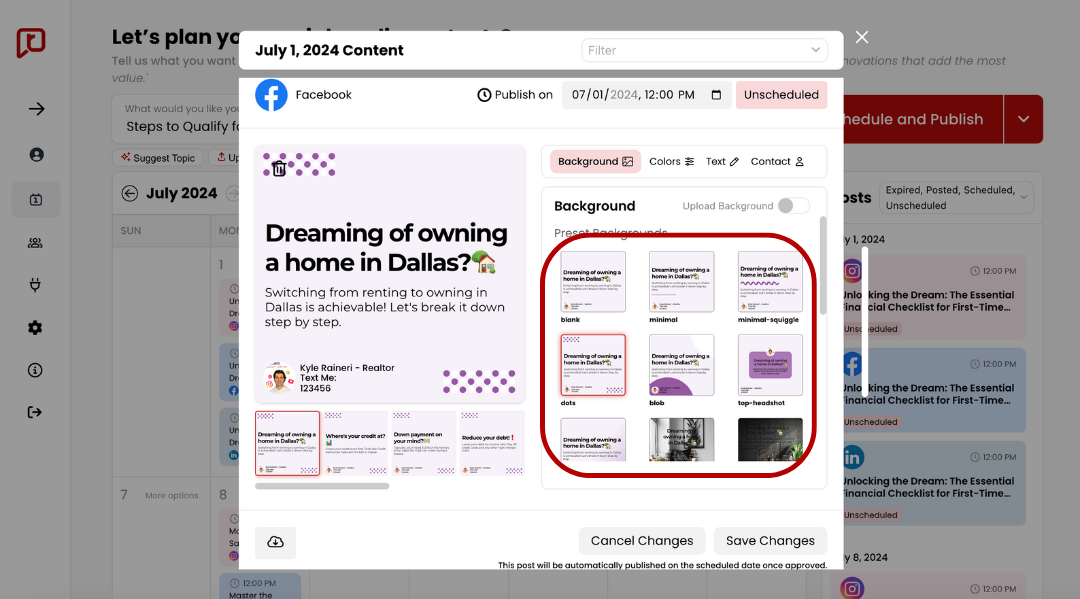
Select background template or upload your own custom background image.
Adjusting colors:
You can change the background and text colors after clicking “Edit Template” directly under the preview window.
Next locate and click on the “Colors” button

RealEstateContent.ai includes a range of preset color pallets to choose from. You can select a preset color pallet from this window.
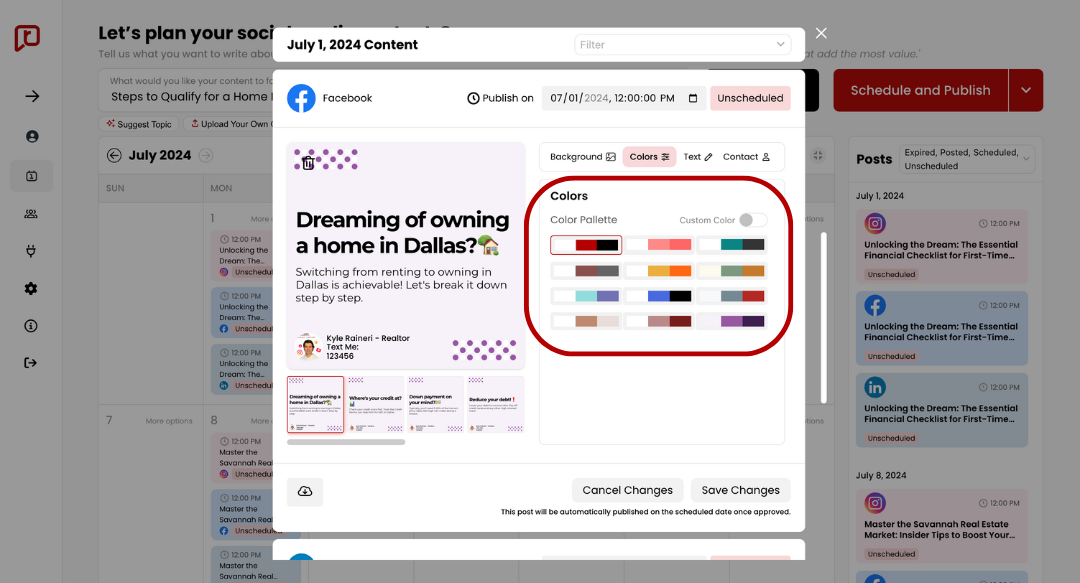
Note: changing your color pallet will only effect posts you generate after the selection is made. Any posts already inside the content calendar will not be effected by changing the color pallet.
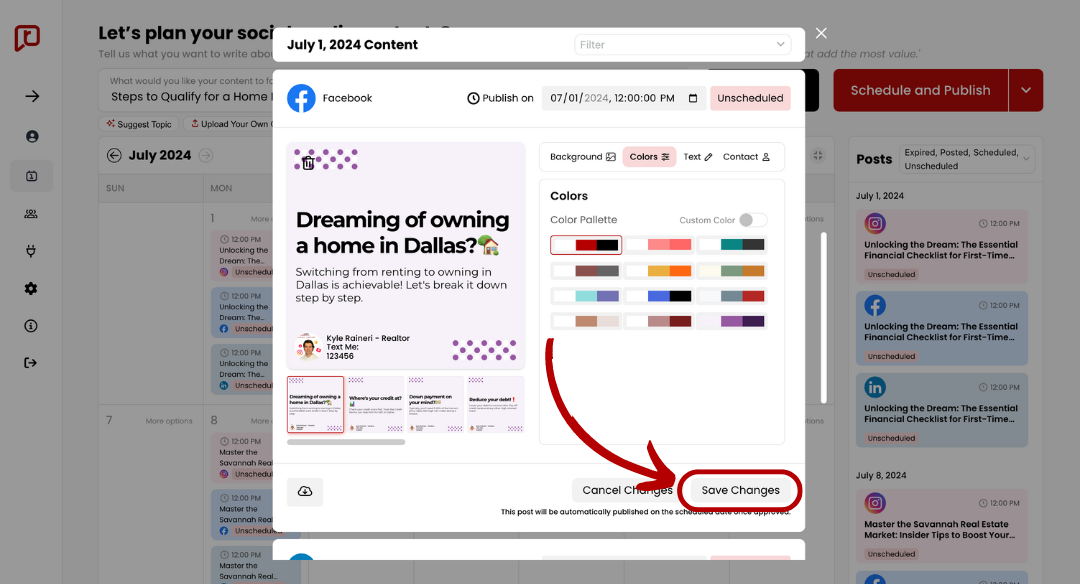
Save your changes by selecting “Save Changes”.
Schedule and Approve:
RealEstateContent.ai will not publish your posts unless you click “Schedule and Approve”

Posts that have not been approved are designated with a red “Unscheduled” sticker. Any post that has this sticker will not be published. Posts that remain unscheduled after the creation date will be changed from “Unscheduled” to “Expired”.
See here for help with Expired Posts
You can find the schedule and approve button on the bottom right corner of each posts preview window. Tip: After clicking “schedule and approve” the red “Unscheduled” sticker will change to a green “Scheduled” sticker.
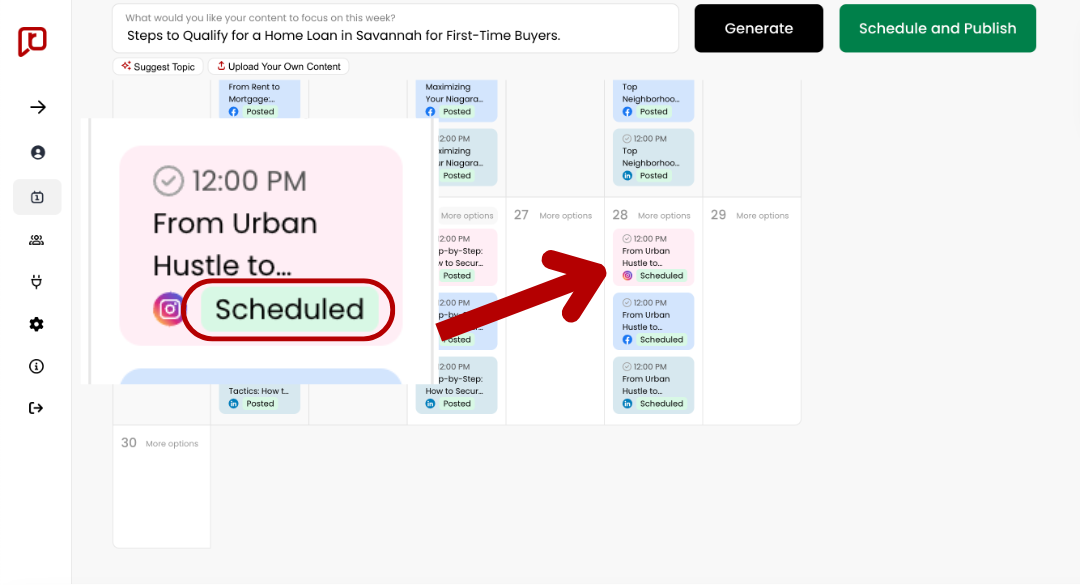
Any post with a green scheduled sticker will publish on its respective date and time.
Deleting Posts
From the content calendar you can delete individual posts, delete all the posts created for a day or delete an entire month. Here’s how to perform each action:
Deleting individual posts
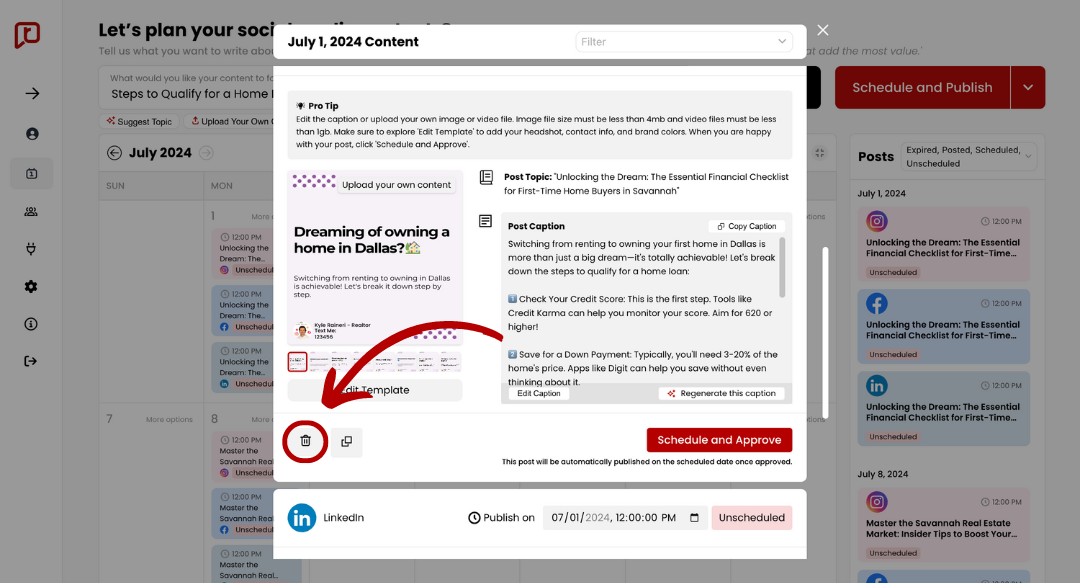
Find and click the post you would like to delete from the content calendar to bring up the preview window. From the preview window, find and click the trash icon in the bottom left corner. Click “Yes” on the popup to confirm your selection.
Deleting the whole day
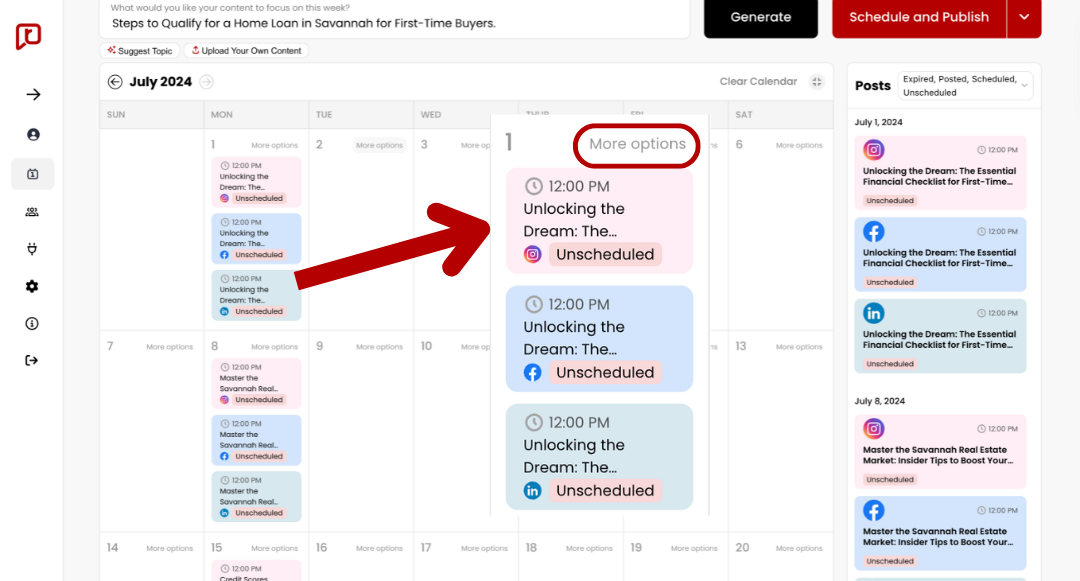
From the content calendar find and select the “more options” button next to the date you wish to delete.
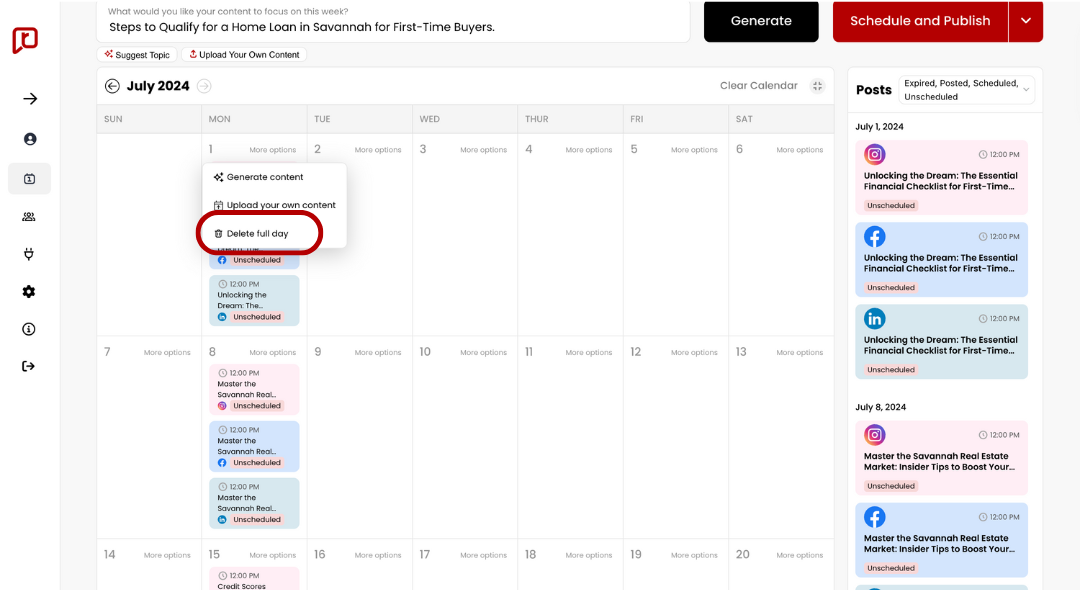
From the more options menu click “Delete full day”. Click “Yes” on the popup to confirm.
Tip: Content that is showing a green “Scheduled” sticker cannot be deleted. To delete scheduled content first click the yellow “Unscheduled” bottom at the bottom right of the preview window.
Deleting the whole month
From the content calendar find and select “Clear Calendar” at the top right of the page.
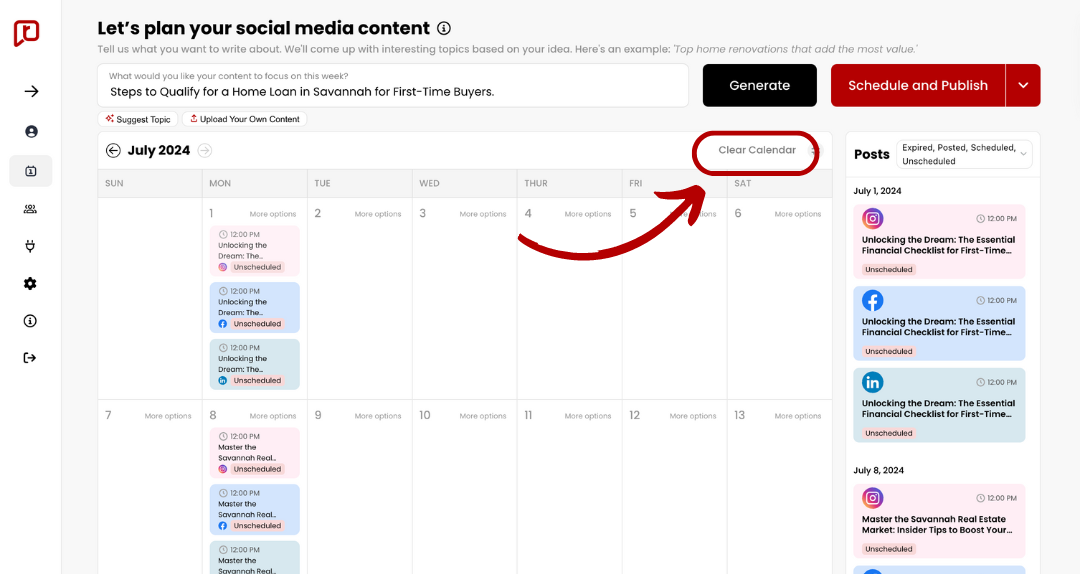
On the popup click “Yes” to approve your selection.
Need Help?
Have questions about using the content calendar? We want to help!
Customer support: support@realestatecontent.ai
Loving RealEstateContent.ai? Want to add more accounts for your agents or brokerage?
Contact sales for a quote: kyle@realestatecontent.ai